Understanding the inblog Editor
Written By inblog Team
Last updated About 1 year ago
The inblog editor offers a clean, intuitive writing experience with autosave enabled by default. Even if the page unexpectedly closes, your work will be preserved automatically.
Creating a New Post
To start writing, click New Post in the left sidebar.
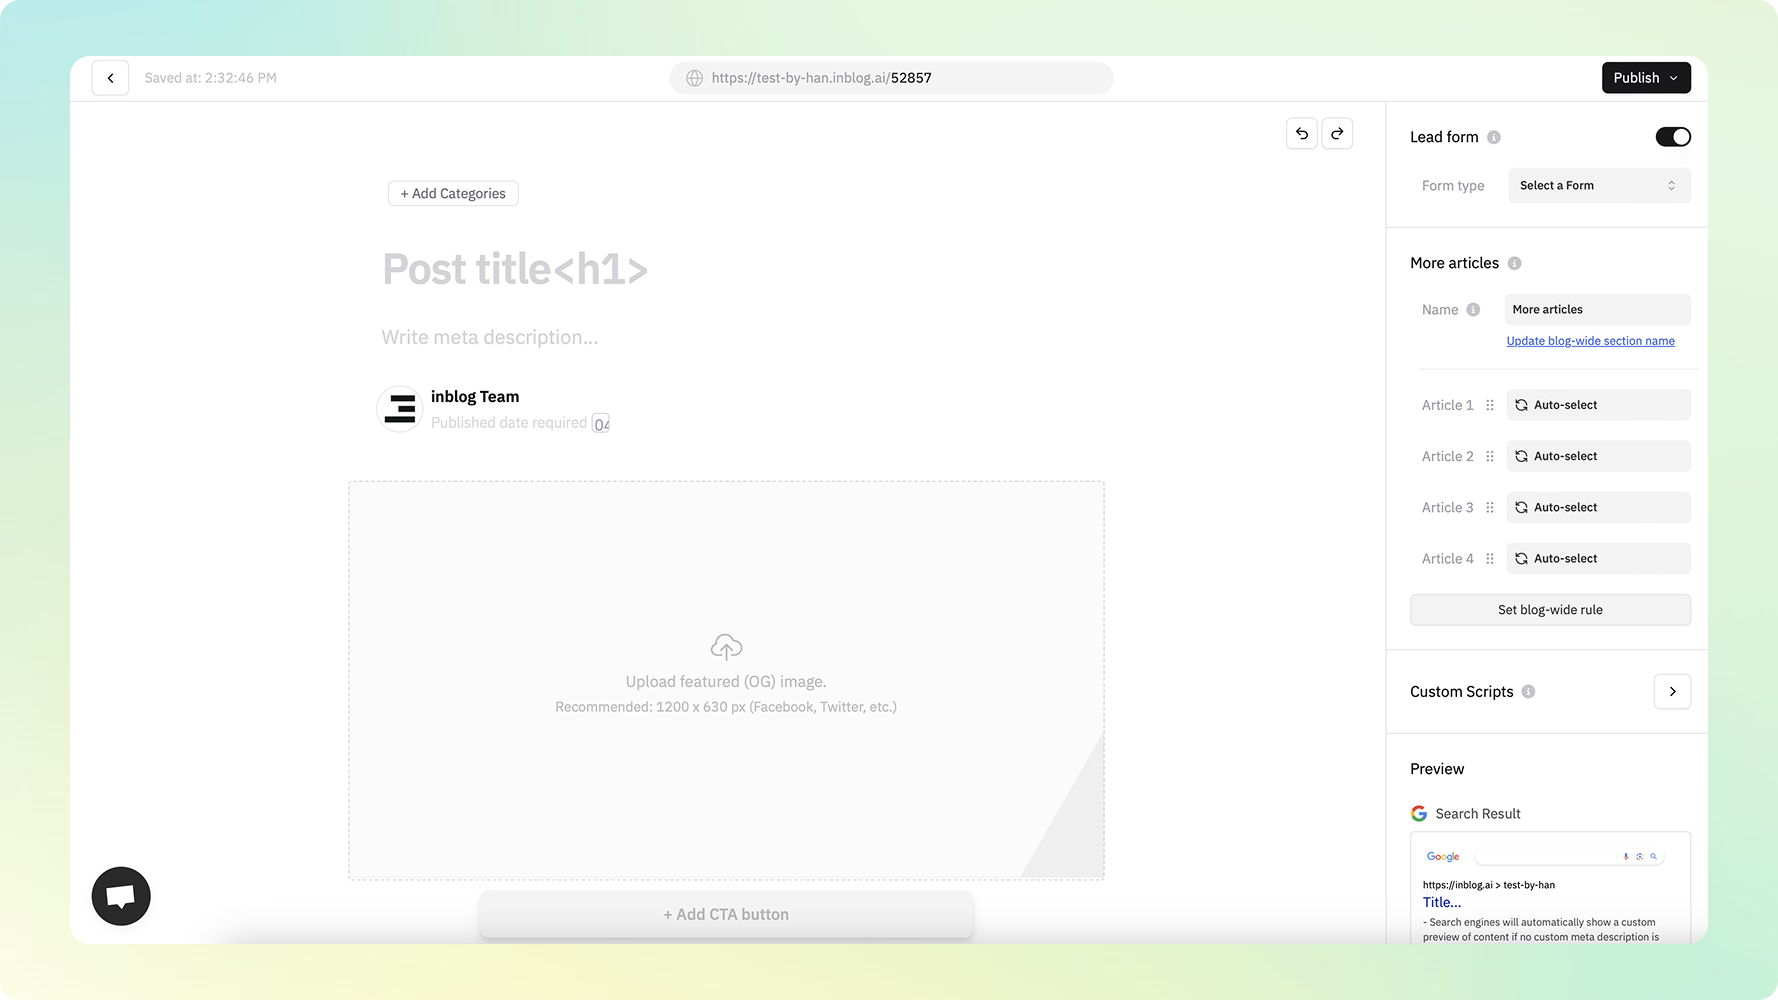
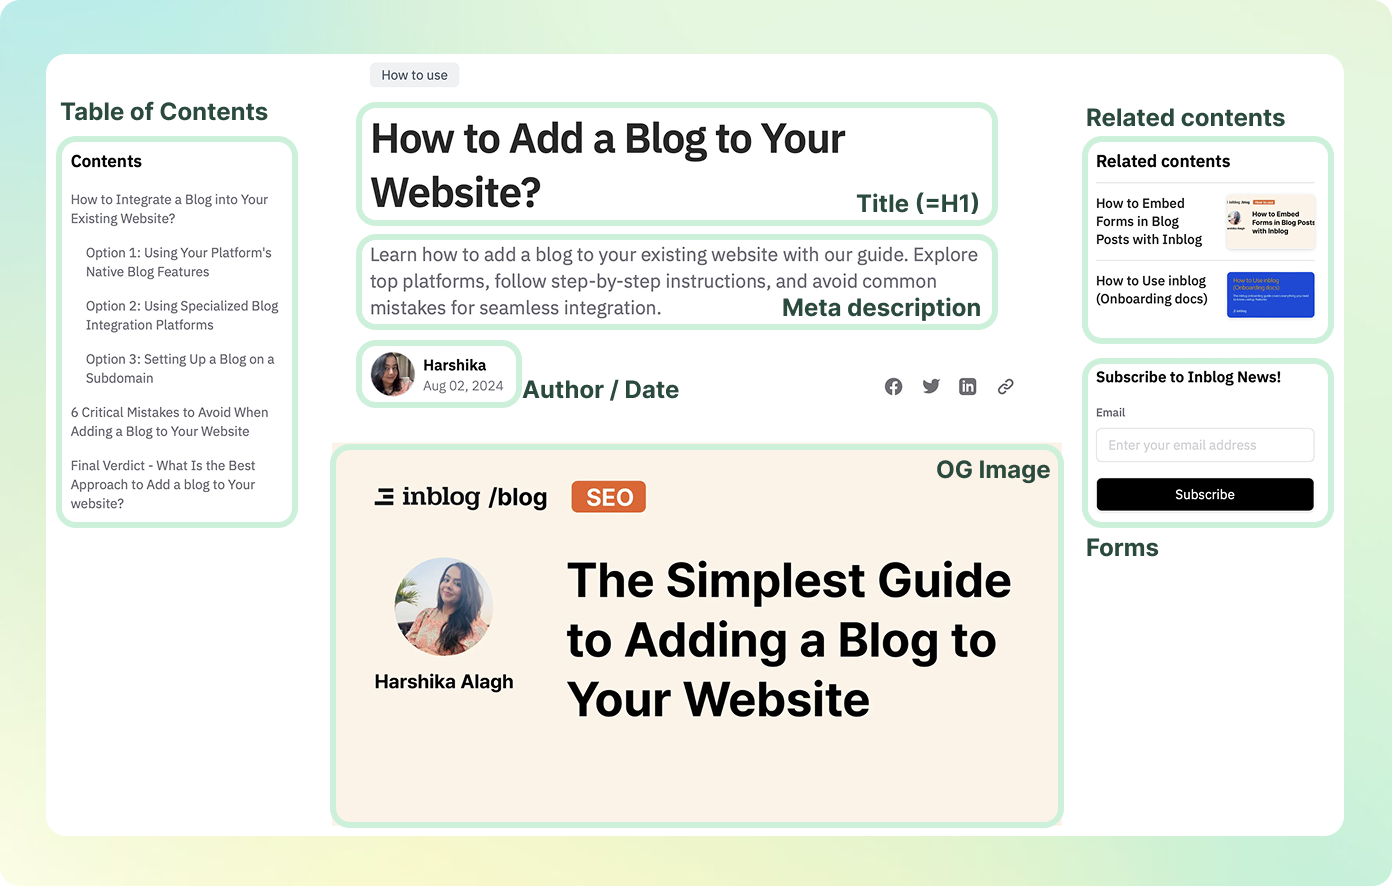
Post Title (= H1 Tag)
The post title is rendered as an H1 tag, which defines the main topic of the page.
H1 tags help search engines (like Google) understand what the content is about.
Description (= Meta Description)
The post description is used as the meta description for the page. This description appears in search engine results and influences click-through rates. You can preview how it will appear in search results using the Google Search Engine Preview in the right sidebar.
Featured Image (= OG Image)
The featured image is used as the Open Graph (OG) image when the post is shared on platforms like Twitter, LinkedIn, or Slack.
If no image is set, a default image will be used.
Recommended size: 1200×630 (to prevent image cropping)
You can preview this in the Social Share section of the right sidebar.
Setting a Category
Click the +Categories button above the title to assign your post to a category. If no categories have been created yet, click Edit Categories to set them up.
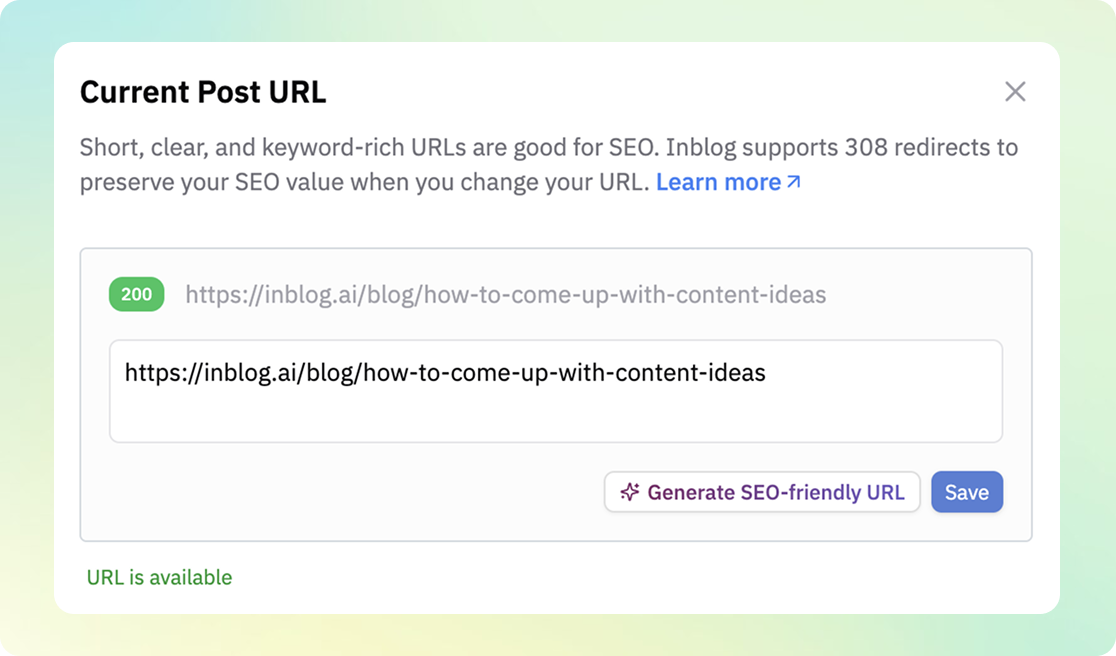
Custom URL Slug
At the top of the editor, you can define a custom URL slug for the post.
By default, the slug is generated from your post title. Google recommends using human-readable slugs (e.g., how-to-start-a-blog, rather than post-123).
You can also use AI-generated suggestions for your URL.
When a slug is changed, automatic redirection from the old URL to the new one is supported.
Publish Date
In the right sidebar, use the Publish date field to schedule or update the post’s publication time.
If left blank, the post is published immediately.
You can also schedule posts for future publishing.
Posts on your blog are sorted by their publish date—most recent posts appear first.