Connecting Google Search Console
Written By inblog Team
Last updated About 1 year ago
The next step is to verify and register your blog with Google Search Console. This step is crucial for two reasons:
It helps accelerate the indexing of your blog and posts.
It’s a prerequisite for submitting your sitemap in the following step.
Once connected, you’ll also be able to track the indexing status and Google SERP rankings for each post directly within your inblog dashboard.
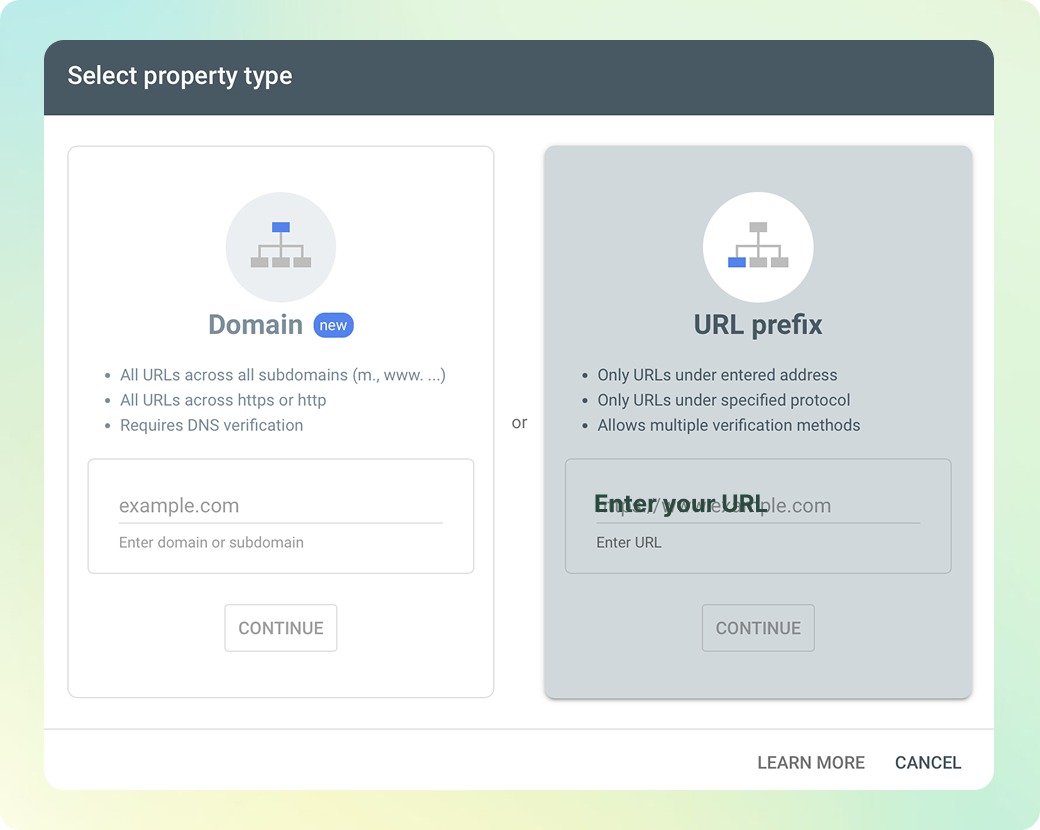
How to Register with Google Search Console
Go to the Google Search Console website. And click
Start Now.

Add Your Blog URL
Enter your blog’s custom domain URL (e.g.,
https://blog.example.comorhttps://example.com/blog)Make sure to include https:// in the URL
Click
Continue
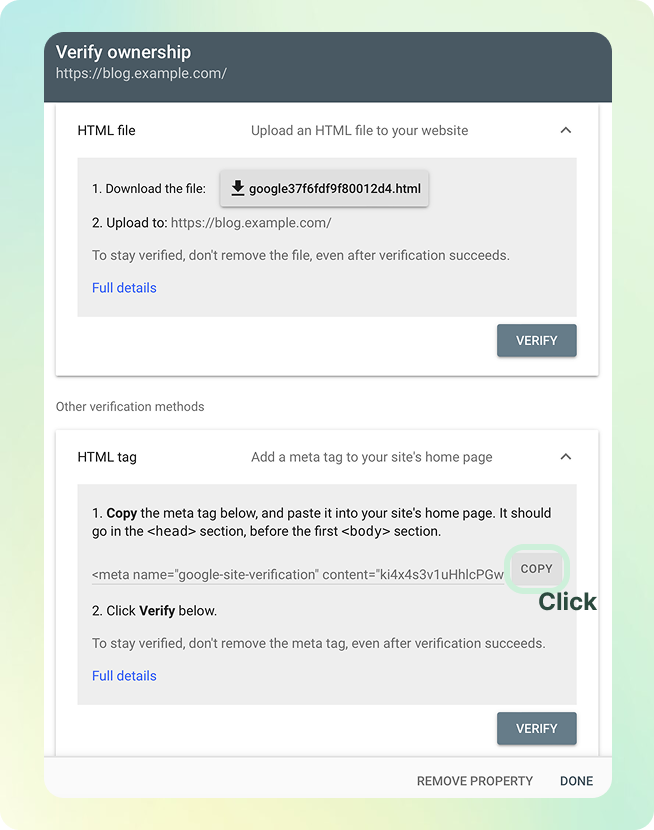
Copy the Verification HTML Tag
Google will provide you with an HTML <meta> tag for domain verification
Copy the entire tag
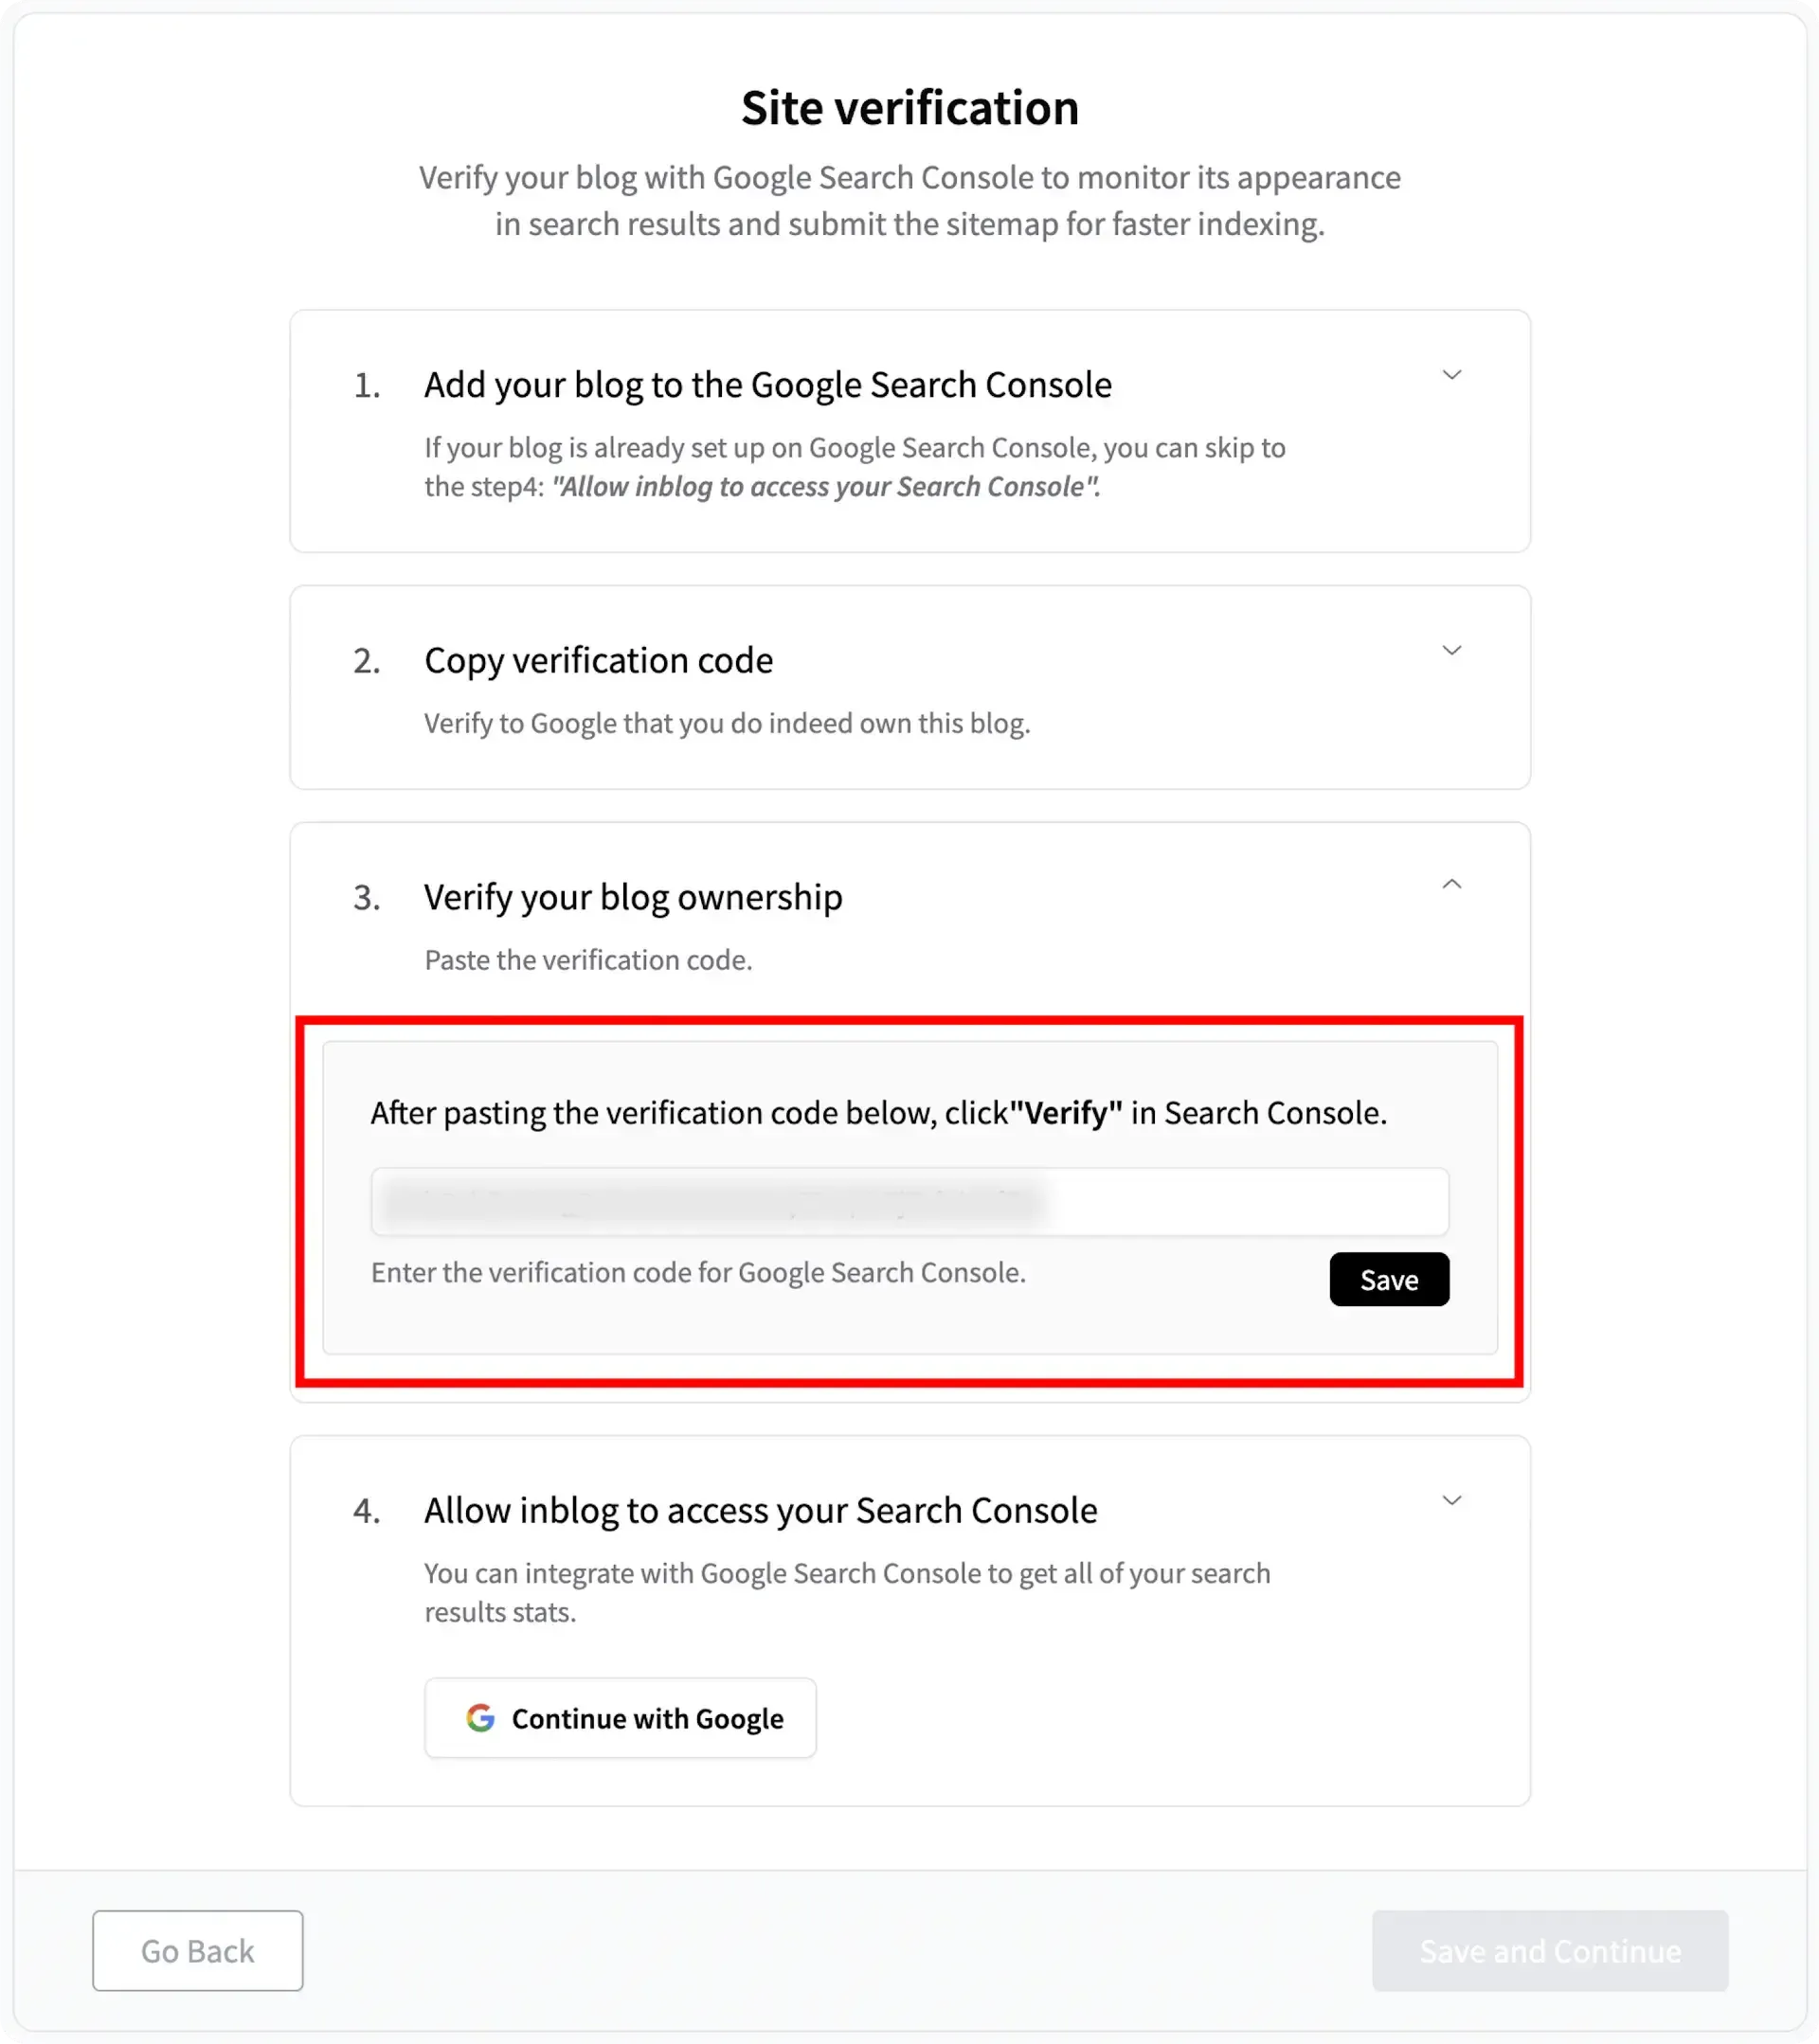
Paste the Tag into inblog
Go to Paste the copied tag in your inblog tutorial
Paste the HTML tag you copied earlier
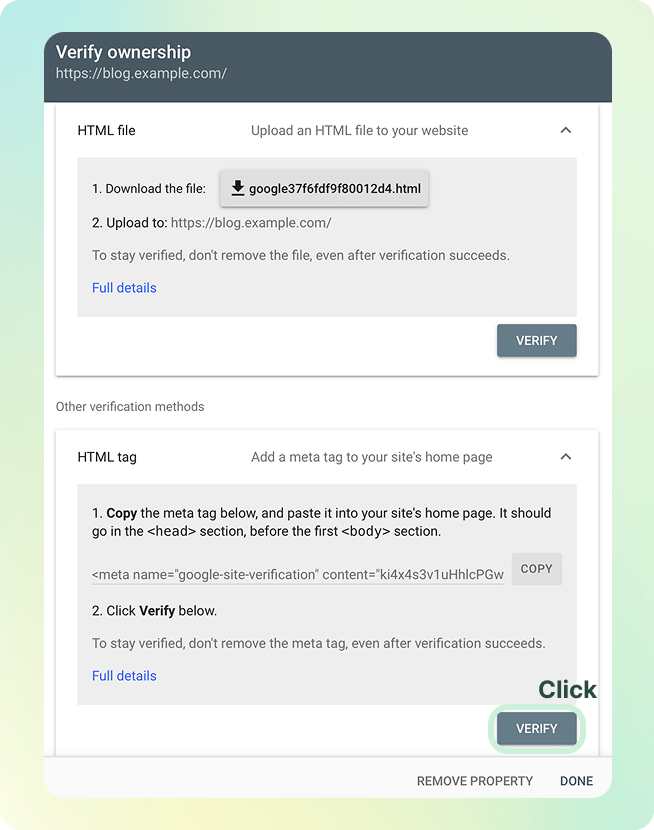
Click “Verify” in Google Search Console
Return to Google Search Console and click Verify
If the verification doesn’t work on the first try, repeat the process 2–3 times
Make sure you’re logged in with the correct Google account when completing Step 5: Click ‘verify in Search Console’